Showing posts with label Create. Show all posts

Friday, 5 April 2019

Cross stitch

Well its been a few months and then some into this is single parenting I now call life and things are very quiet on this blog space while I took time to regroup and focus on getting the boys and I thru the separation as painlessly as possible. There are an overwhelming amount of things to sort when going thru a separation especially if you have assets and kids so I needed a mindfulness activity to take my mind off the stress of daily life. I hadn't done cross stitch in forever so I took that up again over the Christmas break. Im sharing some of my creations.


This Poop cross stitch has to be a favourite of my potty mouthed 7 year old. I bought the pattern off Etsy.


I recently found these two Bunnykins cross stitches I sewed back in my high school days stored in boxes of craft, I wish I had the bedtime one in the room when the boys were babies its so sweet. Im bringing these out as decorations every Easter.


Speaking of Easter I was sewing reusable Easter tags this year but decided the Yoshi one was better suited to a frame above Kobes bed instead.


And finally a nice little keepsake card for a friend who had a baby recently. Incase your wondering I used the leftover hessian from making my lounge covers to sew the pictures onto. Waste not want not.

Next up is a Super Mario themed pj bag for Kobe, a Gumby pj bag for Dylan and a zombie cross stitch for a friends house warming.

Love to hear what your doing for your mindful activity or creating? Comment below.

Happy Friday friends!!
Grace

Tuesday, 1 November 2016

Halloween 2016


Halloween was a lot quieter this year being on a Monday. We celebrated twice by taking Kobe earlier to a Halloween themed disco. His face has 3 different textures of green (2 facepaint & 1 eyeshadow) as he carried on crying (he doesn't like facepaint) for a good half hour I kept having to reapply. I think in future to stick with a mask to limit the drama & stress. I found his top in an opshop the day before. Clearly Im Harry Potter (& for the eagle eyes yes that is a Slytherin robe oops...).

 
When I found this fake knife at the markets, I just knew my ginger haired child would be Chucky. That movie gave me a many nightmares when I was younger. Clearly this costume is so wrong yet so right. Dylan was ready to scare all those tricksters that came to our door (or more like it giggle & wave).


There were so many awesome costumes out & about. My lovely frined Kym went as a unicorn (how did I not take her photo is beyond me?!?). I also saw an Edward Scissorhands, a giant hotdog & a Barbie complete in toy box.


We only had time for a couple upcycling craft projects so the scary gingerbread men will have to wait for next year sadly. Kobe helped to paint an old doll as a Zombie who we hid in the front hedge to frighten passerbys. Some old dolls heads (sorry Ken & friend) were also used to make spooky specimen jars.
 
I hope you all had a happy Halloween!
Grace

Wednesday, 20 July 2016

Theme cakes

 
July is a month full of birthdays. So why not dedicate a post to delicious cake, Theme cakes. Kobe is a mad fan of search & find books so I made him a "Where's Wally" cake for his birthday. It turned out really good considering it was my first time using royal icing. I did stain my hands from using food dye to colour white royal icing which washed off after a few days.  
 
 
We recently watched & enjoyed "The Lorax" (I now want the catchy soundtrack lol) so I made these cupcakes for Poppy's birthday.


Not to exclude some talented mummies I know, my friend Kira aced another birthday cake with this doll cake dotted with fluffy marshmallows.
 
 
And what little girl wouldn't wont a Frozen cake? My friend Nicole made this for her daughters birthday last year. The snowflakes were divine!


Happy Wednesday friends!
Grace
 
**I apologise if your on a diet while viewing these delicious cakes...

Wednesday, 27 January 2016

Handmade gift ideas


I have been feeling a little creatively stifled lately so I decided to go thru my photo archives of things I have sewn either for my family or friends/friend's child for gifts as inspiration. This year I hope to be more creative & make most of the gifts we give.


Kobe is a mad fan of "Cut throat kitchen" & "Chopped" so I couldn't help myself by making a few extra food bits & an apron to add to his cooking challenges. A tutorial on how I made the ice cream cone is here. I made the apron from an old smock dress.


I sewed these dolls clothes for Kobes cousin's cabbage patch doll (modelled on my extremely old doll whose hair I butchered}. I love love the retro bathers I made from fabric from a top I bought but never wore.


Last year I made a lego/duplo mat for my next door neighbour's boy. I never understood the value of these mats until Kobe received lego for his birthday & Christmas. Perfect for him to play on & then when he is finished I just pull on the drawstrings to close it up like a bag. No more stepping on random lego pieces.


Jazzing up some otherwise plain jumpers with cutesy animals.
 
Happy Wednesday friends!
Grace


Tuesday, 29 December 2015

Festive crafts


Im always itching for a creative project. Here are a few we have done lately. These photo props (above) are perfect for New Years Eve.

 
We never got around to making Christmas cards this year so I asked Kobe to pick 6 people (who live in our area) that he can write a new years card to & attach a homemade birdfeeder.


Inspired by this delightful Christmas tree outfit, I sewed this Christmas tree hat for Kobe.
 
 
Cant go past a paper plate craft project when you have kids.
 
And a couple projects from last years Christmas.
 
 
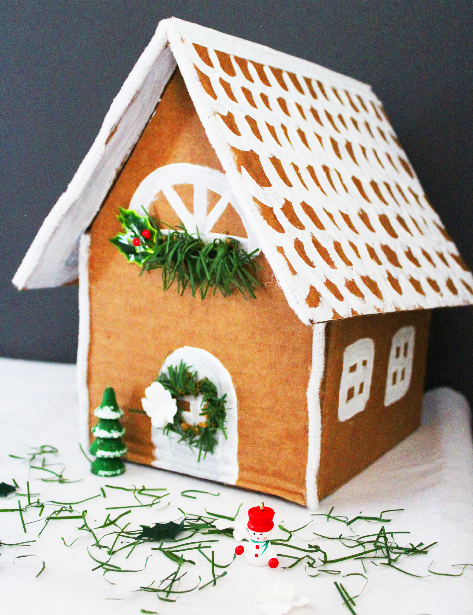
"Cardboard" gingerbread house.
 
 
Decorating tree & snowflake cookies.
 
 
Im looking forward to being more organized for more creative projects in 2016.
Happy Wednesday friends!
Grace

Saturday, 7 November 2015

D.I.Y. Spider Costume

 
I had planned to do a few crafty Halloween activities with Kobe like last year but time got the best of me with the addition of newborn Dylan, we did manage to make eyeball cookies (only 4 as Kobe broke the rest of the cookie pack when I turned my back for a minute... so we ate those cookies plain lol). I didn't want Kobe to feel left out now he has to share my time so I promised to take him trick or treating for Halloween & make him a costume of his choice which was a spider (but not spiderman).
 
 
1.I used an old skivvy, some goggle eyes, felt, cushion insert, elastic, white wool, black fabric and red ribbon.
 
 
2. I used a dinner plate as a template to cut out a spider body then sewed on scrap red ribbon for the red back spider line.
3/4. For the legs, I measured 30cms length & 12cms width with a stitch length of 1.5cms. Kobe helped me stuff them with cushion insert. I sewed them onto the spider body then onto the skivvy.
5. For the spider webs, I roughly measured white wool along the back of the legs & hand sewed them in place.
 
 
6. The mask was the easiest bit, I cut out 2 bits of felt, measured elastic to go around Kobe's head then glued on the goggle eyes.
 
 
Halloween is clearly a winner with Kobe. Knocking on people's door & being given delicious candy to eat. We are quite lucky a good friend of mine's street goes all out for Halloween, we went early to beat the crowd. Everyone went all out for costumes, I even saw a Mr Potato head! I was a bit slack & went as a cat (which was basically cat ears, some face painted whiskers/nose & wore all black). I think next year I will be a hamburger hee hee.


Happy Sunday friends!
Grace

Sunday, 16 August 2015

A four year old's ice cream party


Kids parties are so wasteful (but super exciting!!!) & pro-plastic & Kobes was no exception. We tend to make conscious decisions in our day to day life to minimise wastage however celebratory parties are the exception.


I decided to go low key this year. I was going to skip a birthday party but Kobe asked all excitedly for one, & with baby brother due soon I thought why not have one to celebrate him while he doesn't have to share my attention. I held it during the week which catered to mums & kidlets who didn't have work or daycare/school that day & Luke took the day off to help with set up & packaway.


Not everything went to plan. The fudge cake I made in haste the night before was left a little to available for small sticky fingers to poke & crumble. So I had to make a mad dash down the shops in the morning to buy a premade cake & topped it with ice cream lollies. The rainbow jelly in orange slices turned out to be too much effort cleaning out the orange skins to set the jelly in so I settled for plastic cups (which were washed & recycled afterwards). The heart shaped bird seed hangers we made to go with the party favours didn't set & crumbled.


Overall it was a relaxed affair with a few games chucked in for fun; I made a donut piñata which Kobe could pull a tab & out came the goodies (I enjoyed watching the kidlets make a mad dash to the goodies!), pass the parcel (with recycled wrapping paper & also catalogues lol) & "where does this go into recycling/rubbish" game (I use to play this game with Kobe all the time & surprisingly 2 of his mates were avid recyclers:)). I think the best part was when I cleverly asked all the kidlets to put on their ice cream cone hats if they wanted their lolly bags. Perfect solution to get some happy snaps of the kidlets wearing them. Man they looked cute! The only downsize was the cones were real cones which crumbled easily but I guess not a worry once the party was over as could feed to the birds.

 
And to offset all the plastic & junkfood used for the party we gifted potted flowers as party favours.

 
Kobe really enjoyed himself (plus I enjoyed making all the crafty touches) so it was a success in my eyes.
 
Happy Monday friends!
Grace

Friday, 24 July 2015

D.I.Y; A donut pinata

 
My lil man turned 4 the other week & to celebrate I held a small party. There wasn't a theme this year like his cowboy & indian theme 3rd birthday party last year just mainly junkfood (like most kids parties) so I decided to make a donut piñata because they are so much fun to watch the lil ones make a mad dash for the treats. The sugar comedown afterwards, not so much...
 
 
I used an empty cereal box, plus some sturdier cardboard for the round donut circles (off an old boardgame lid), a dinnerplate & Kraft peanut butter lid for the donut circle templates, scissors, Mont Marte acrylic paint, paint brush, masking tape, clear drying glue, stapler, velcro, a mix of bright beads & sequins, & wool (for tying up the piñata).
 
 
1.Using the sturdier cardboard, I cut out 2 large circles (from dinner plates, they measured roughly 23cms in diameter). Then in the centre of the circles, I traced out the smaller circle (donut hole) using the Kraft peanut butter lid. Then cut that out. I measured the inner circle so that I could cut out a strip of cardboard (from the cereal box) to join around the edges of the "donut hole" with masking tape. This strip was roughly 12cms in width.
2. It should look like this side view on. Like a large sewing bobbin.
3. Next I measured the outer edge of the large circle. I cut a strip to fit around the side of the "donut" with the same width of 12cms & used masking tape to secure it. I left an opening for the treats to come out.
 
 
4. It should look like this side view on.
5. I painted the whole outside of the "donut". Then to seal the opening to hold the treats in. I stapled some Velcro on. This way Kobe could peel open the piñata & watch the treats fall so his friends could run & grab what they wanted. Plus I can reuse it when needed.
6. I went crazy splashing the glue, sequins & beads on. (I only did one side). Also make sure you have clear drying glue, it gives a nice donut glaze look. I did a coating of glue over the top of the sequins & beads for extra support.
 
And...


Last of all tying the donut piñata (filled to bursting point with treats) to a tree. For an extra touch I tied mini donuts next to it. I wish I tied them lower so the kids could of ate them off the string. Oh well next time.
 
 
Happy Friday friends!
Grace
 

Friday, 10 July 2015

DIY: statement necklace

 
Im such a fan of 80's jumpers so when I came across these eccentric 80's buttons at the markets for a couple dollars I jumped for joy. They would go perfect with this large gold chain I picked up at an op shop a while back. Lately I have been favouring simple outfits like oversized jumpers & leggings as nothing seems to fit anymore. So this statement necklace is perfect for jazzing up an otherwise plain outfit.


I used wire cutters, pliers, a thrifted necklace, 80's buttons, bead wire, necklace hoops and bead clamps.
 
 
1. After sorting out a pattern on which I wanted the buttons to go. I threaded some bead wire thru the necklace loops & thru the button opening (at the back of the button). Once I was happy with the length I used my pliers to seal a bead clamp so the button wouldn't slip off.
2. I wrapped 2 lots of bead wire thru the button so it wouldn't twist around when I wore it. Then trimmed off the excess bead wire with the pliers.
3. Next up I measured how low/high I wanted the necklace to hang around my neck & used the wire cutters to trim off the excess necklace chain. Then using the pliers I secured the bead hoop so that the clasp could join it to secure the necklace.
 
 
And tada... My statement necklace is complete.
 
 
(Excuse my pasty face I was fighting off a nasty cold & damn that double chin of mine! BOO!!!).
 
Kobe couldn't help getting in on making something too, after complaining my necklace smelt of olive oil (always has food on the brain this child of mine) he threaded some beads & random bits & bob onto pipe cleaners to make bracelets. Here we are with our fabulous DIY creations:)
 
 
Happy Friday friends!
Grace